
If you have a baby (or a drooly toddler), you already know bibs are like socks in our house. They disappear, they get stained, and somehow we always need one more. The good news is a reversible bib is one of the fastest, most satisfying sewing projects you can knock out during a nap window, and you can make it absorbent enough to actually do its job.
This is my busy-parent version: minimal fuss, sturdy finishes, and a simple way to get older siblings involved without turning your sewing table into a glitter bomb.
What makes this bib work
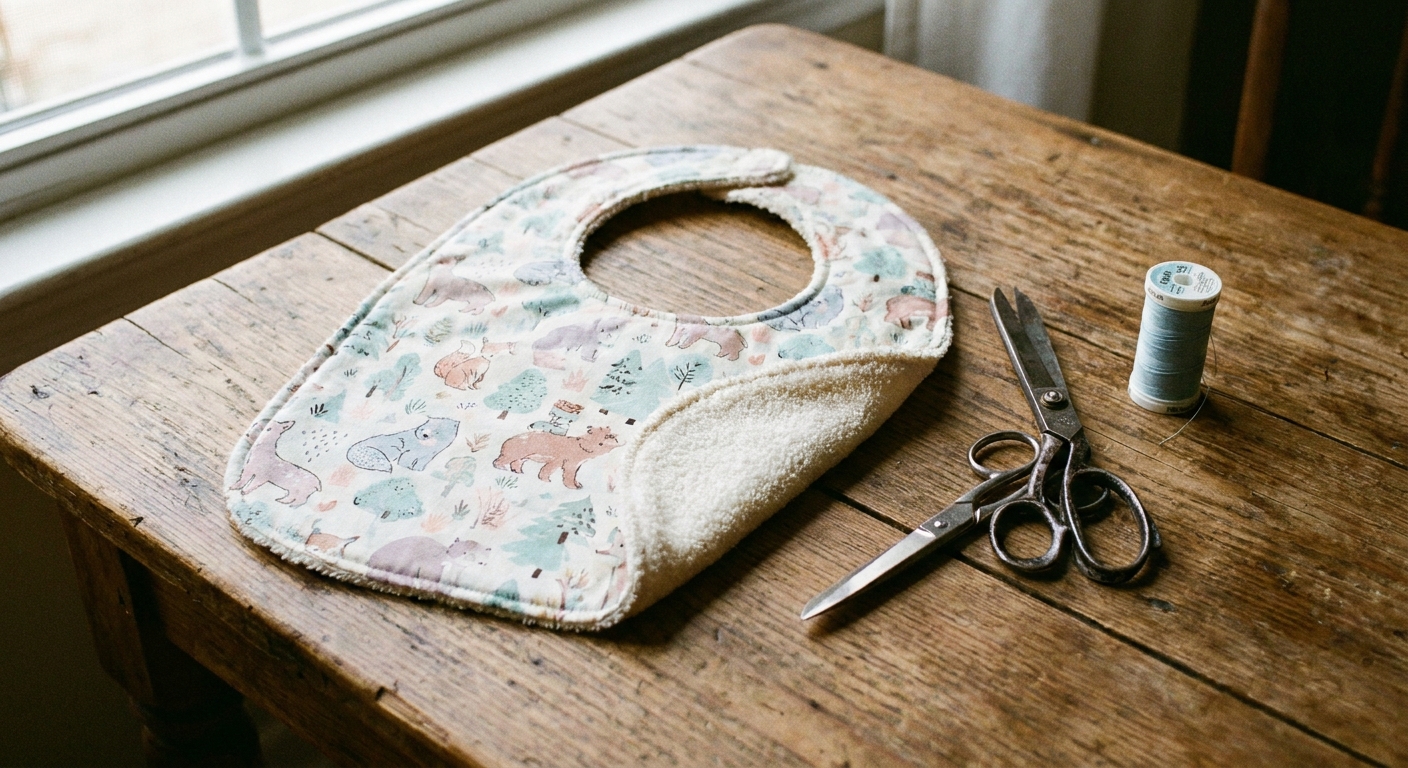
- Reversible: two cute sides, so it lasts longer between laundry loads.
- Absorbent core: one layer of terry cloth, bamboo fleece, or cotton flannel helps catch drool and spills.
- Easy closure: snaps are fast and durable, but Velcro works too.
- Clean finish: sewn right sides together, then turned and topstitched.
If you are building out a small homemade bib stack, pick 2 to 3 coordinating cotton prints and one neutral absorbent fabric. It makes mixing and matching feel intentional, even when you are dressing a squirmy baby one-handed.
Supplies (keep it simple)
- Woven cotton fabric for the front: a fat quarter is often enough for 1 bib, and sometimes enough for 2 depending on your pattern and print direction.
- Absorbent fabric for the back: terry cloth or cotton flannel are the easiest. Bamboo fleece and French terry also work, but they can stretch or curl, so plan on extra clips and slower stitching.
- Optional inner layer for extra soaking power: cotton flannel, Zorb, or an old clean cotton towel (trimmed smooth). If you use Zorb, check for a “right” side and be ready to trim and notch a little more because it can be stiff.
- Matching thread
- Closure: 1 set of plastic snaps, or a small piece of sew-on Velcro.
- Tools: sewing machine, fabric scissors or rotary cutter, pins or clips, turning tool (a chopstick works), iron, snap pliers if using snaps.
- Nice-to-have for bulky layers: a 90/14 needle, a walking foot (especially for knits), and a “hump jumper” or folded fabric scrap to level the presser foot at thick strap seams.
Busy-parent shortcut: If your absorbent fabric is bulky (like towel terry), use it as the back layer and skip the optional inner layer. If your absorbent fabric is thinner (like flannel), add the optional inner layer.
Size and pattern (no printing)
You can absolutely trace an existing bib you like. That is the fastest route.
If you do not have one handy, here is an easy “fits most babies” shape to draw on paper first, then cut out as your pattern:
- Main bib shape: about 9.5 inches wide by 11 inches tall (rounded bottom corners).
- Neck opening: a U-shape about 3 inches wide and 3 inches deep.
- Neck straps: extend each side of the neck opening out about 2 inches so you have room for snaps or Velcro.
Once you have a paper pattern you like, label it “bib” and keep it folded in your sewing box. Future-you will be grateful.
Step-by-step: reversible bib
1) Pre-wash your fabrics
Cotton and absorbent fabrics can shrink. Pre-washing prevents the first laundry surprise where your bib puckers and twists.
2) Cut your layers
- Cut 1 piece from your cotton print (front).
- Cut 1 piece from your absorbent fabric (back).
- Optional: cut 1 piece from your inner absorbent layer (same shape).
Tip for terry cloth: Cut slowly and do not stretch it. Terry likes to wiggle.
3) Stack and clip
Layer in this order:
- Cotton front right side up
- Optional inner layer centered on top
- Absorbent back right side down so the two “pretty” sides face each other
If your absorbent fabric does not have an obvious right side (hello, terry and flannel), either orientation is fine.
Clip or pin around the edges. Mark a 2 to 3 inch turning gap along the bottom curve or any straight-ish spot that is easy to sew closed neatly.
4) Sew around the edge
Stitch around the bib with a 3/8 inch seam allowance, leaving your turning gap open. Go slowly around the curves.
Stitch length: I like 2.0 to 2.5 for durability, especially around curves and straps.
Reinforce the straps: Backstitch at the beginning and end, and consider an extra line of stitching across each strap area because those spots get tugged.
5) Trim and notch
- Trim seam allowance slightly in bulky areas (especially if using terry, towel, or Zorb).
- Clip small notches into the seam allowance around the curves (do not cut through the stitching).
This is the difference between a bib that lays flat and a bib that looks like it is doing interpretive dance.
6) Turn and press
Turn the bib through the gap. Use a chopstick or turning tool to gently push out the curves and straps.
Press, folding the raw edges at the turning gap inward so the edge looks clean and even.
7) Topstitch to finish
Topstitch around the entire bib about 1/8 inch from the edge. This closes the turning gap and helps the bib keep its shape after washing.
Optional but helpful: Add a second line of topstitching about 3/8 inch from the edge for extra durability, especially if you are using a stretchy absorbent back.
8) Add the closure
Snaps: Place one snap on the underside of one strap and the matching snap on the top side of the other strap so the bib closes neatly around the neck. A simple starting point is centering the snap about 1/2 inch from the strap end. Install according to your snap kit directions.
Safety note: Install snaps securely and follow the snap manufacturer’s age and use guidance. Give each snap a firm tug test before it goes anywhere near your baby, since loose pieces can be a choking hazard.
Velcro: Sew a small rectangle (about 1 x 2 inches) of hook tape to one strap and loop tape to the other. Use a box stitch around the edges for strength.
Comfort note: Keep closures a little away from the very edge of the strap so nothing scratchy rubs baby’s neck.
Sibling help (the safe parts)
When my older kids want to “help,” I try to hand them jobs that feel real and keep everyone safe. Fabric selection is the sweet spot.
Let them pick with guardrails
- Give them two cotton options you like and let them choose the winner.
- Offer a theme prompt: dinosaurs, flowers, trucks, dots, or “something that matches baby’s pajamas.”
- Teach the quick rule: busy print hides stains. Kids love feeling like they learned a secret.
Good jobs for little hands
- Match cotton front to absorbent back (their “designer” job).
- Hold the paper pattern while you trace (far away from the rotary cutter).
- Place clips around the edge.
- Press buttons on snap pliers only if they are old enough and you are guiding their hands.
Make it a mini set
If you cut assembly-line style, older siblings can “assign” each bib to a day of the week, a meal (breakfast bib, spaghetti bib), or a nickname (the “dragon bib”). It sounds silly, but it reduces drama when you need a bib fast and someone wants the one that is in the wash.
Batch sewing tips
- Cut 4 to 6 at once. The cutting and pressing are the slow parts, so do them in a batch.
- Chain sew. Sew one bib, then feed the next without cutting thread between pieces.
- Use one neutral absorbent back. Same back fabric for all bibs means less decision fatigue.
- Keep a bib pattern with your sewing tools. No re-drafting every time.
For more simple, doable projects like this, you can browse our Kids Crafts guide.
Common issues (quick fixes)
My bib edge is wavy
This usually happens when one layer stretches more than the other (common with knits, bamboo fleece, or terry). Next time, use more clips, sew slowly, and avoid pulling the fabric. A walking foot can also help. You can press with steam and topstitch to tame it.
The bib will not lay flat on curves
Clip more notches in the seam allowance around curves (without cutting stitches). Those little cuts let the fabric spread and flatten.
The neck hole feels too small
For the bib you already made, unpick a few inches of topstitching and the seam near the neck curve, trim a tiny bit, then re-sew and re-topstitch. For your next bib, adjust the paper pattern first so you are not doing surgery on a finished one.
Velcro is scratching
Make sure the hook side is placed so it does not touch skin when the bib is open. Many parents also prefer snaps for this reason.
Care and durability
- Wash: cold or warm is fine. Hot washing and high-heat drying can wear Velcro faster over time.
- Dry: tumble low or hang dry, especially for terry to reduce linting.
- Stains: treat quickly. Busy prints help, but so does a fast rinse after spaghetti night.
If you make a small stack of these, they hold up beautifully, and they look store-bought in the best way.