

The fastest way my house goes from cozy to chaotic is a rainy afternoon plus three kids who have already “played with everything.” I used to print random coloring sheets, hunt for missing crayons, and then end up with paper scraps everywhere. Now we have one grab-and-go solution: a reusable “boredom buster” binder that my kids can use again and again with dry-erase markers while I start dinner, answer emails, or just drink my coffee while it is still warm.
The best part is that this binder is not fancy. It is durable, simple, and built for real life. You can assemble the basic version in under an hour, then add pages over time.
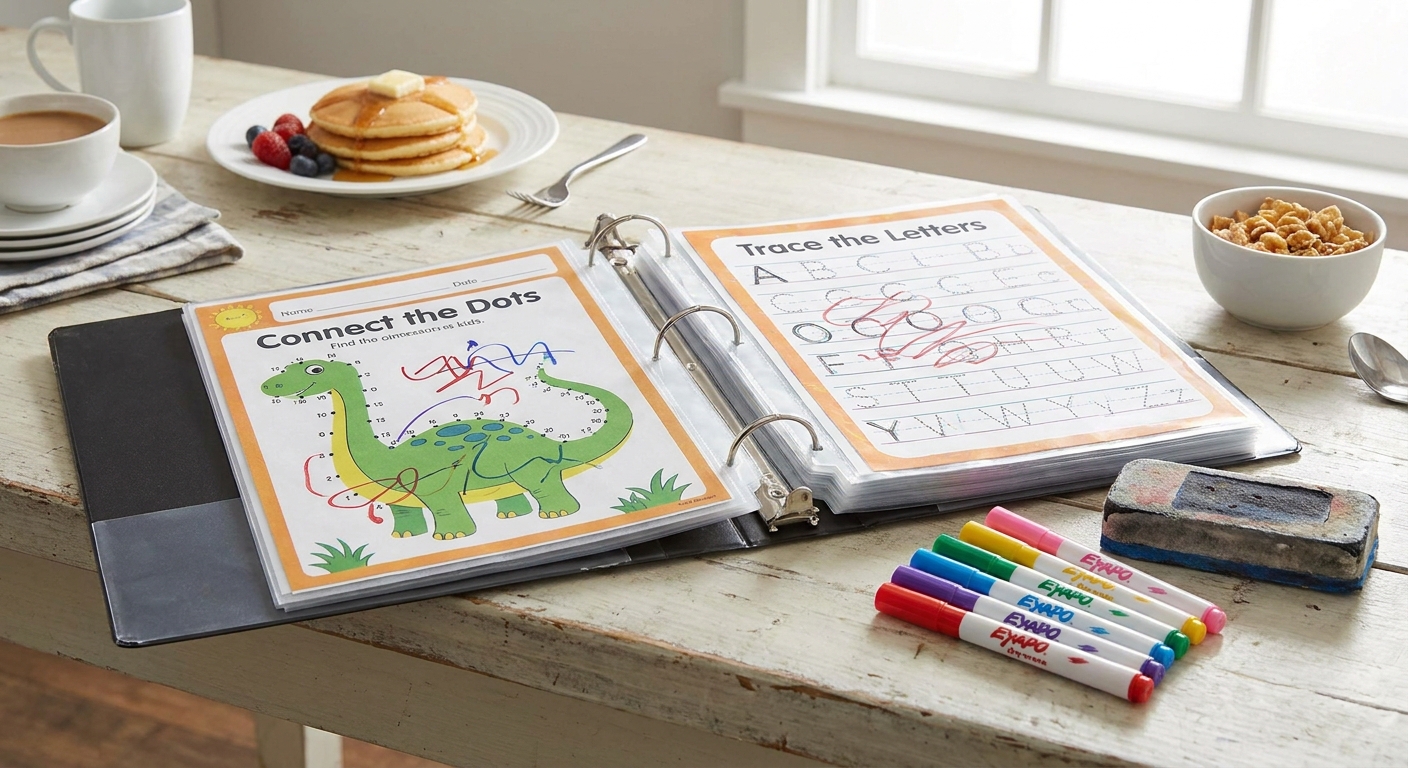
What makes it reusable
“Reusable” means you are not reprinting every time a page gets filled. The pages need a wipe-clean surface and the binder needs to survive rough flips, spilled water, and the occasional marker cap left off overnight.
- Wipe-clean pages: Laminated sheets or pages inside sheet protectors.
- Simple reset: A dry-erase marker plus a small cloth or felt eraser.
- Kid-friendly organization: Tabs or sections so kids can pick an activity without dumping the whole binder.
- Contained supplies: Markers and eraser stored right in the binder so you are not hunting for them.
Supplies (two options)
Option A: The “done today” setup
- 1 sturdy 1 to 2 inch three-ring binder
- 25 to 50 clear sheet protectors (heavyweight if possible)
- Dry-erase markers (fine tip can feel easier in small spaces)
- Small felt eraser or a soft microfiber cloth
- Binder pouch with zipper (or a pencil case you can hole-punch and clip in)
- Sticky tabs or divider tabs
Option B: The “extra durable” setup
- Everything above, plus:
- A laminator and laminating pouches (or access to lamination through a school or office store)
- Hole punch that can handle laminated sheets, or pre-punched laminating pouches
- Reinforcement rings for any pages that start to tear at the holes
My practical tip: Sheet protectors alone can work beautifully for most pages. Lamination is fantastic for heavily used pages like mazes and tracing, but you do not have to laminate everything on day one.
Put it together in one afternoon
1) Choose a binder that fits your life
Pick a binder you will not mind seeing on the counter. Ours lives on a low shelf in the kitchen because that is where the whining usually finds me.
- As a rough guide: a 1 inch binder often fits a small set of pages, and a 2 inch binder gives you more breathing room for sections and swaps.
- Reality check: ring shape (round vs D-ring) and the bulk of sheet protectors and laminated pages can change capacity a lot, so buy a little bigger if you are on the fence.
2) Pick activities that work well with dry-erase
The best pages are the ones kids can repeat without getting bored. Aim for a mix of quick wins and longer focus activities.
- Trace-the-line pages (shapes, roads, loops)
- Mazes (multiple difficulty levels)
- I-spy pages (find and circle items)
- Letter practice and name writing
- Number tracing and ten-frames
- Draw prompts (example: “Draw a pet dragon”)
- Would-you-rather questions (circle your choice)
- Mini checklists (example: “Build a blanket fort”)
3) Prep pages for durability
If using sheet protectors: slide each page into a protector. That is it. It wipes clean, and you can swap pages anytime.
If laminating: laminate, let cool fully, then trim if needed. Punch holes carefully and consider reinforcement rings for the most-used pages.
Marker reality check: some dry-erase markers ghost on certain plastics. Test one page first before you laminate a whole stack.
4) Make sections kids can read fast
Keep section names simple and visual. My kids do better with “Pick a page” categories than “Fine motor skill development.”
- Quick Picks (2 to 5 minutes): dot-to-dot, mini mazes, small I-spy
- Brainy (5 to 15 minutes): patterns, number puzzles, word hunts
- Calm Down: breathing prompts, simple mandala coloring, stretch cards
- Draw: doodle prompts, finish-the-picture
5) Attach supplies so they do not wander
This is the difference between “the binder works” and “this binder is one more thing I manage.”
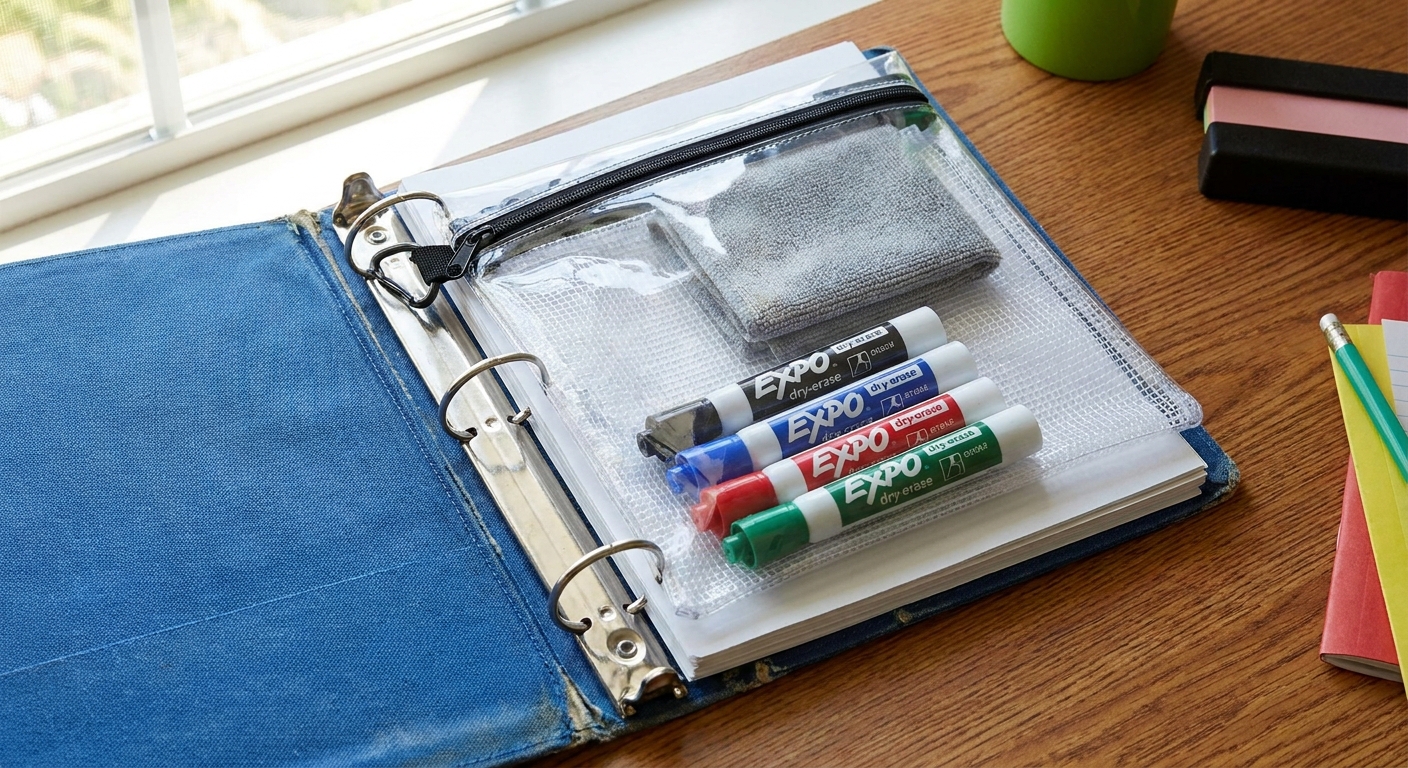
- Clip a zip pouch into the rings with 2 to 4 dry-erase markers.
- Add a slim cloth or felt eraser.
- If you have younger kids, include 1 darker marker only. Fewer choices equals less chaos.
6) Add a 30-second reset habit
Teach one rule: wipe the page before you turn it. If your child is little, make it a job you do together for the first week. Once that habit sticks, the binder stays pleasant to use.
If erasing is the sticking point: go bigger. Use larger shapes, fewer items per page, and thicker markers that are easier to grip. You can also do a quick “erase check” before the binder goes back on the shelf.
Reusable page ideas
You do not need fancy printables to make this work. You can create a lot of pages yourself in a document, or by scanning your own hand-drawn pages.
Quick note on printing: skip scanning or copying pages from workbooks or paid downloads unless the license clearly allows it. When in doubt, make your own version. Simple wins.
For toddlers and preschoolers
- Pretend parking lot: draw a simple “parking lot” with blank spaces. Kids draw cars and “park” them.
- Dot-fill rows: big circles to fill with dots or X marks.
- Trace and erase: 10 big shapes per page, repeated.
- Emotion faces: blank circles where kids draw a happy face, mad face, sleepy face.
For early elementary
- Word hunt: a simple letter grid where they circle words you call out.
- Roll and draw: write a dice key at the top (1 = add a hat, 2 = add stripes, and so on). They roll and keep adding to one silly character.
- Maze ladder: put 4 mazes on one page so it feels like a challenge set.
- Write three: “Write 3 animals, 3 foods, 3 things you can find outside.”
For mixed ages (my go-to)
- Would you rather: ten questions on one page. Everyone circles answers.
- Story builder: “Who + Where + Problem + Helper + Ending.” Kids fill blanks, then tell the story out loud.
- Scavenger hunt: an indoor hunt list they can check off with a dry-erase marker. (If you want more structure, pair it with our scavenger hunt format and adapt it for indoors.)
If your kids like storytelling activities, you can also tuck in a few simple prompts inspired by these quick story starters and let them pick one when they feel stuck.
Keep it from turning into clutter
Binders can quietly multiply pages until kids stop using them. Here is the simple system that keeps ours fresh.
Use the 10 page rule
Each section gets up to 10 pages. If you want to add a new one, you remove an old one. Store extras in a folder in a drawer.
Rotate a few pages by season
Every few months, I swap in a handful of themed pages. Nothing huge. Just enough novelty to make it feel new again.
- Fall: leaf matching, draw-a-scarecrow
- Winter: snowman build page, cozy indoor checklist
- Spring: raincloud maze, garden planning doodle
- Summer: road trip games, outdoor scavenger prompts
Add one parent win section
This is the sneaky part that makes the binder useful when you need a solid stretch of time.
- 3 to 5 longer activities (bigger mazes, multi-step draw prompts)
- 1 calm-down page (breathing or simple stretches)
- 1 independent-play idea list
If your kids need a physical reset before they can focus, pair binder time with a quick movement burst like the ideas in this indoor obstacle course list.
Dry-erase tips that help
- Keep permanent markers out of it: do not store them in the same pouch. Ever.
- Test your markers: some fine tips erase beautifully, and some do not. If you notice ghosting, switch brands or use a different page surface.
- Wipe with microfiber: paper towels can leave fuzz behind inside sheet protectors.
- Clean occasionally: if a page starts to look cloudy, a tiny bit of rubbing alcohol on a cloth can clear residue. Test a small corner first, use it sparingly, and keep it out of kids’ reach. Let the page dry fully before closing the binder.
- Cap-on habits: I keep one “marker hotel” page at the front with three little checkboxes: “Caps clicked,” “Markers in pouch,” “Cloth back in.”
Housekeeping note: dry-erase marker can travel. If you have toddlers, supervise closely, cap markers between uses, and consider washable markers for peace of mind. I also keep the binder on the table, not the couch, because one little slip can become modern art.
One binder for mixed ages
I am a big fan of one family binder with a few “levels.” Here is how to set it up.
- Color code the tabs: one color for little-kid pages, one for bigger-kid pages.
- Put easiest pages in front: younger kids lose patience faster, so give them immediate wins.
- Add a few blank pages: slide plain cardstock into sheet protectors. These become endless doodle boards.
- Use page protectors as pockets: a few protectors can hold extra challenge sheets you only bring out sometimes.
Quick-start: 25 pages
If you are starting from scratch, this mix tends to keep kids busy without you constantly hosting the activity.
- 5 tracing pages
- 5 mazes (varied difficulty)
- 4 I-spy or search-and-find pages
- 4 draw prompts
- 3 number or math pages
- 2 word or handwriting pages
- 2 calm-down pages (breathing, stretches, simple gratitude prompt)
Once it is assembled, you can confidently say: “Grab the binder and show me when you finish three pages.” That little structure helps kids settle in instead of bouncing after 90 seconds.
Common questions
Is lamination better than sheet protectors?
Lamination is tougher and feels more “official,” but sheet protectors are flexible and easier to update. For most families, sheet protectors are the simplest win. If a few favorite pages get heavy use, laminate just those.
What if my kid presses so hard the page warps?
Use a thicker sheet protector or laminate that specific page. You can also slip a thin piece of cardboard behind the page inside the protector to make a sturdier writing surface.
How do I keep siblings from fighting over the binder?
Two easy fixes: keep a couple of blank dry-erase pages in the binder so a second child can doodle, and store one extra marker in the pouch so they are not sharing a single pen.
A simple rainy-day rhythm
One last trick that makes the binder feel magical is pairing it with a predictable rhythm. Ours is basically: snack, 10 minutes of movement, binder time. If you need an easy movement reset, these gentle stretches are a good fit for afternoons when everyone is climbing the walls.
The binder is not about keeping kids busy every minute. It is about creating a reliable option that does not require you to perform. On the days you need both hands and half a brain, that is a small kind of peace.