

On weeks when my kitchen table is already doing triple duty (homework, snacks, and a science project I did not agree to), I reach for crafts that feel fancy but behave themselves. Tape resist art is one of my favorites because the setup is quick, the results look legitimately frame-worthy, and cleanup stays in the “wipe the table and move on with life” category.
If you have painter’s tape and a basic watercolor set, you are in business. The tape does most of the hard work, kids get the fun of painting freely, and the big reveal (pulling the tape) is the kind of payoff that keeps them engaged through the end.
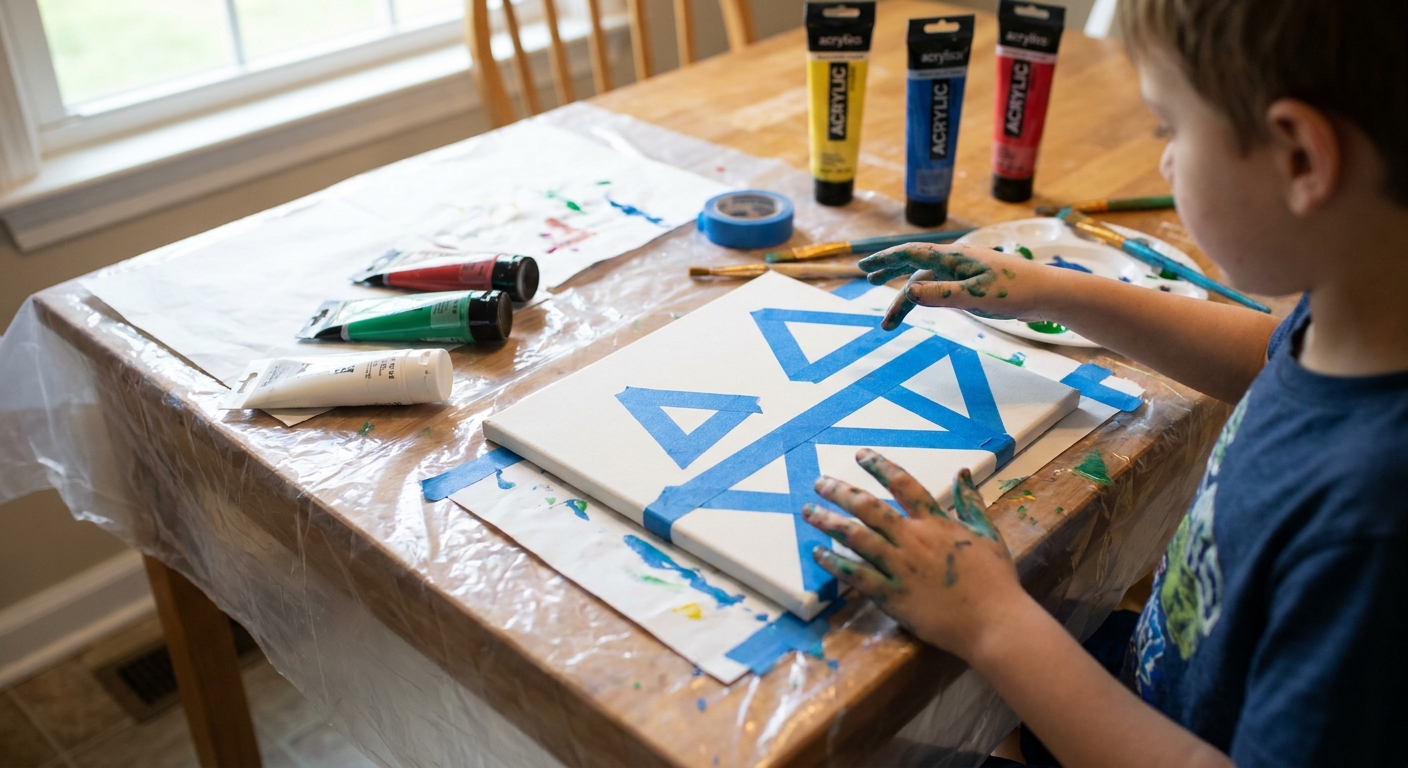
Why tape resist art works so well with kids
- Fail-proof structure: The tape creates clean lines even if the painting is wild.
- Minimal prep: No drawing skills needed. Straight tape lines look modern and intentional.
- Low mess by design: Watercolors are easier to manage than acrylics for most kids, but they can still stain clothing and porous surfaces. Old shirts or a smock are your friend.
- Built-in patience practice: Waiting for paint to dry before the “tape peel” feels like a game.
Supplies (and easy swaps)
What I use
- Painter’s tape (blue or green)
- Watercolor paints
- Small canvas or canvas board
- Paintbrushes (1 medium, 1 small is plenty)
- Water cup
- Paper towels or an old rag
- A palette (or a white plate)
- Table protection (trash bag, freezer paper, or an old shower curtain)
Smart swaps if you are using what you have
- No canvas? Use heavy watercolor paper, mixed media paper, or thicker cardboard (chipboard), like the back of a cereal box covered with white paper.
- No watercolor set? Watered-down washable tempera works, and so do watercolor markers blended with a wet brush.
- No painter’s tape? Masking tape can work, but it is stickier. Reduce tack first (tips below) and test a corner.
- Want bolder color? Use liquid watercolors or add less water so the paint dries more saturated.
My one non-negotiable
Use painter’s tape if you can. It is made to pull up more cleanly than regular tape, but it is not magic. Paper quality, how long the tape sits, and how firmly it is pressed down all matter, so I always test a small strip on the back or edge first. Also, try not to leave tape on for hours or overnight.
Best surfaces for crisp lines
You can do tape resist on lots of surfaces, but these are the most reliable for kids:
- Canvas board: My top pick. It is sturdy, inexpensive, and the tape usually peels nicely.
- Stretched canvas: Great for gifts, but tape can lift paint on the sides if kids wrap tape around the edges.
- Watercolor paper (140 lb): Excellent results, especially if you want to mail the finished art.
If you are using regular printer paper, it will warp quickly with water. It is doable, but expect more ripples and a softer look.
Quick canvas note: Some pre-primed canvases are less absorbent, so watery paint can bead up at first. If that happens, use less water, or brush on a quick, light wash (clear water or very pale color) to “break the surface,” then paint as usual.
How to do tape resist art
1) Set up a two-minute “mess boundary”
Cover the work surface, set out a water cup and paper towel, and put the paint palette in the middle. This is the part that keeps me from spiraling later.
If you have toddlers in the mix, keep tape out of mouths and plan to supervise the peeling step. Excitement and sticky strips are a chaotic combo.
2) Tape your geometric design
Give each child a canvas and let them lay tape strips however they want:
- Crisscross lines for triangles
- Parallel lines for stripes
- A big X and a few extra strips for a stained-glass look
- A simple border frame around the edge
Press the tape down firmly. I tell kids to “seal the roads” by rubbing along each tape edge with a fingernail. This helps stop paint from sneaking under, but do not mash it into the paper like you are trying to laminate it. Extra pressure can make peeling harder later.
3) Paint the sections
Let kids paint freely inside the taped shapes. A few approaches that work beautifully:
- One color family: blues and greens look calm and cohesive.
- Rainbow by section: each shape gets a different color.
- Ombre wash: start dark at the top and add more water as you move down.
- Splatter accents: after the main painting, flick a loaded brush for tiny dots.
Tip for cleaner lines: Keep paint from pooling along the tape edge. A very wet brush pushes pigment under tape more easily. Blot the brush once on a paper towel before painting near tape.
4) Let it dry completely
This is the hardest part for kids, so I make it concrete: “We are going to clean brushes and pick up scraps while it dries.” Drying time depends on how wet the paint is and your room’s humidity, but it is usually around 10 to 30 minutes. The goal is dry to the touch.
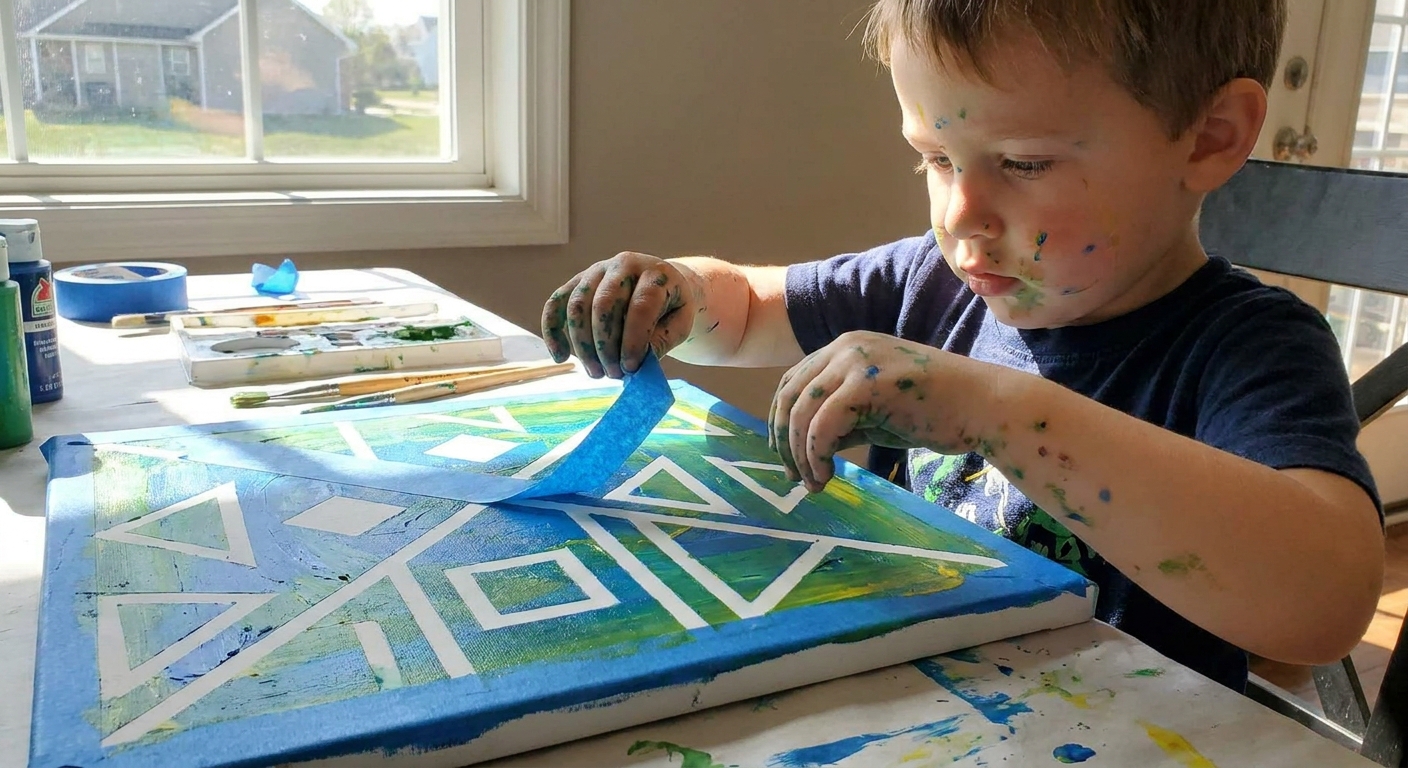
5) Peel the tape for the big reveal
Slow is the secret. Peel tape back over itself at a low angle. I aim for “dry to the touch” and then peel, instead of leaving tape on for the rest of the afternoon. If your child is very young, start the peel for them and let them finish.
6) Optional finishing touches
- Outline lines: Once dry, trace the white lines with a thin black marker for a bold stained-glass look.
- Add metallic: A gold paint pen on a few sections looks surprisingly fancy.
- Name and date: On the back. Always on the back. Trust me.
Make it low-prep
If you want this craft to feel easy in real life, not just in theory, here is the version that works in my house:
- Pre-cut tape strips: Tear 10 to 15 strips and stick them to the table edge so kids can grab and place.
- One water cup per two kids: Fewer cups means fewer spills.
- Limit brush choices: One medium brush handles most of the painting.
- Trash bowl in the middle: A cereal bowl for tape backings and paper towels keeps the table from disappearing under scraps.
Cleanup in 5 minutes
- Have kids put tape scraps in the trash bowl.
- Rinse brushes and lay them flat on a towel.
- Dump watercolor water into the sink and rinse the cup.
- Wipe the table covering if reusable, or roll it up and toss it.
- Set artwork on a drying spot that is out of traffic.
If you are doing this with multiple kids, label the back of each canvas right away. Three kids and similar color choices can turn into a surprisingly dramatic ownership debate.
Common problems
Paint bled under the tape
- Cause: Tape edges were not pressed down or paint was too wet.
- Fix: Press tape edges firmly before painting. Use less water near tape. If bleeding happens, let it dry and cover small spots with a white paint pen or a tiny dab of white acrylic.
The tape tore the paper or lifted paint
- Cause: Tape was too sticky, left on too long, or peeled too fast.
- Fix: De-tack tape first by sticking it to your shirt or jeans once, then apply. Peel slowly at a low angle. If you taped down paper edges, remove the tape slowly and gently once the paint is dry to the touch, not the next day.
Canvas warped or buckled
- Cause: Too much water on thin paper or very soaked canvas board.
- Fix: Use watercolor paper or paint with less water. For paper, tape the edges down to the table with de-tacked tape and remove it slowly when the painting is dry to the touch.
Kids painted over the tape on purpose
Honestly, that is fine. When the tape comes off, it still looks cool. If you want brighter white lines, remind them the tape is “the wall,” not “the floor.”
Design ideas kids love
- Lightning bolts: Tape a zigzag line down the canvas, then add a few smaller zigzags.
- City skyline: Tape rectangles along the bottom half, then paint a sunset sky above.
- Sunburst: Tape rays coming out from one corner and paint each wedge a different warm color.
- Big initial letter: Tape an easy block letter (like E, H, M) and paint around it for a negative-space monogram.
If your kid freezes when faced with a blank canvas, offer two choices: “stripes” or “triangles.” Constraints are calming.
Age tweaks
Toddlers (2 to 4)
- Adults lay the tape design.
- Use fewer tape sections (big shapes).
- Offer 2 to 3 paint colors so it does not turn brown.
- Supervise tape handling and peeling.
Preschool and early elementary (4 to 8)
- Let them tape with pre-torn strips.
- Encourage “one section at a time” painting to avoid soaking the whole canvas.
Older kids (8+)
- Try thin tape for more complex designs.
- Add a second layer: paint once, dry, re-tape, paint again for overlapping geometry.
Displaying the finished art
A few easy ways to make the finished pieces feel special:
- Stand canvas boards on a bookshelf or mantel for rotating “gallery” art.
- Tape watercolor-paper versions to a wall with washi tape for a no-frame display.
- Use it as gift wrap: mount a painted sheet on a box lid or wrap around a small package.
More low-prep ideas
If your kids love projects with a clear beginning and end (and you love crafts that do not take over the house), you might also enjoy browsing our Kids Crafts guide. For days when you need something even simpler, I also keep a stash of story-based activities for waiting rooms and errands, like the ideas in 5-Minute Invisible Story Games for Grocery Lines.